On premise CI/CD/CD with VSTFS2015 and IIS
Many clients I visit are still not on the cloud and are still not using VSTS (Visual Studio Team Services) online and Azure.
Meaning, they still have on premise infrastructure for their applications. Now, I don’t want this blog post to turn into a defence of cloud (more specifically PaaS). Rather, I want to quickly show you how you can setup a CI/CD/CD (Continuous Integration/Delivery/Deployment) delivery pipeline with an on-premise instance of VSTFS 2015 deploying to machines with IIS .
Basically, if you’re still on premise! It’s not an excuse to disregard DevOps practices!!
Build
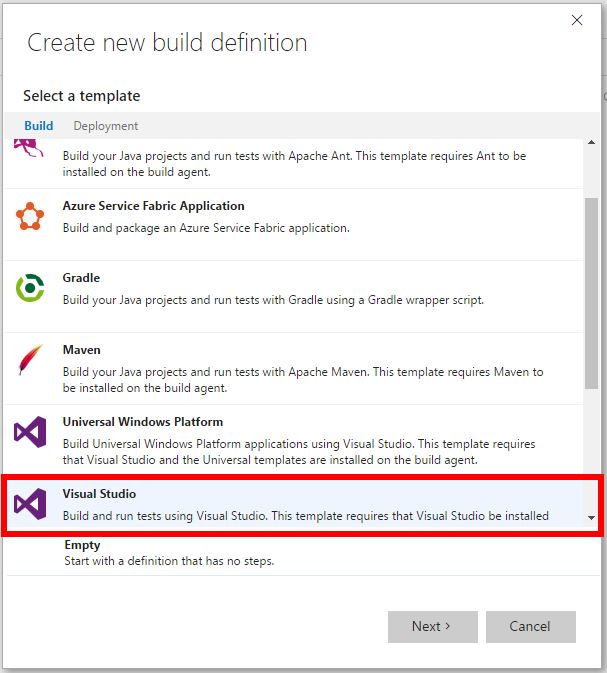
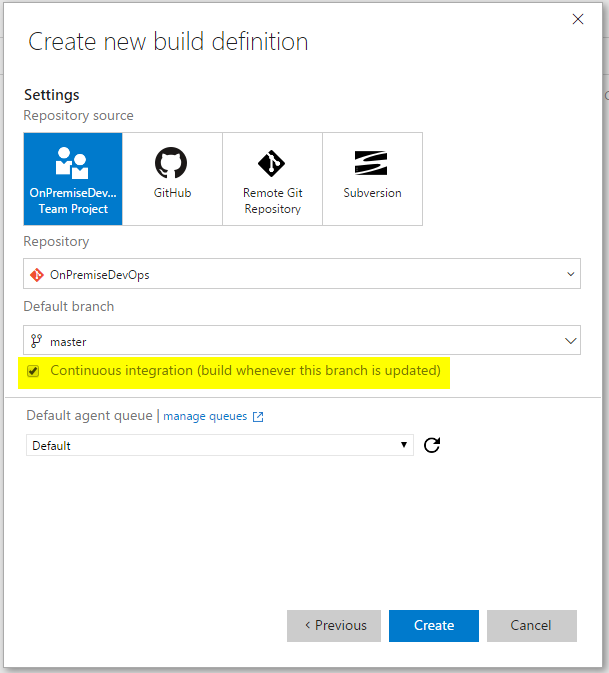
The first step is to setup your builds. To do this navigate to the build tab in your Visual Studio Team Foundation Server 2015 collection and create a new build definition:
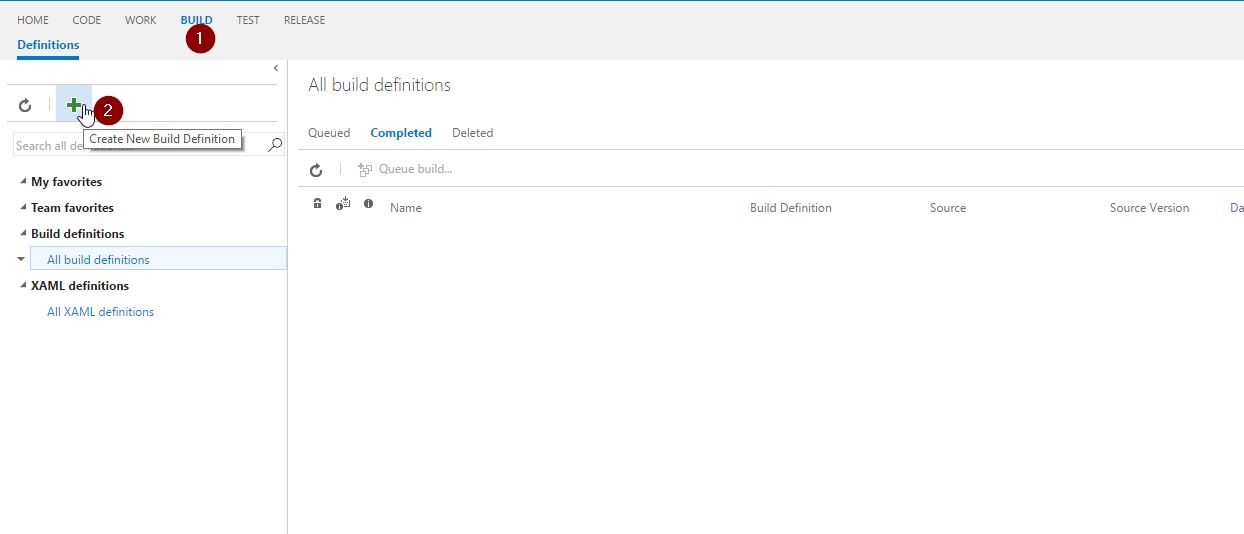
Follow the wizard and be sure to tick the box ‘Continuous Integration’. By ticking this box you ensure that on every commit (or checkin if you’re using TFS-VC) your code will compile.
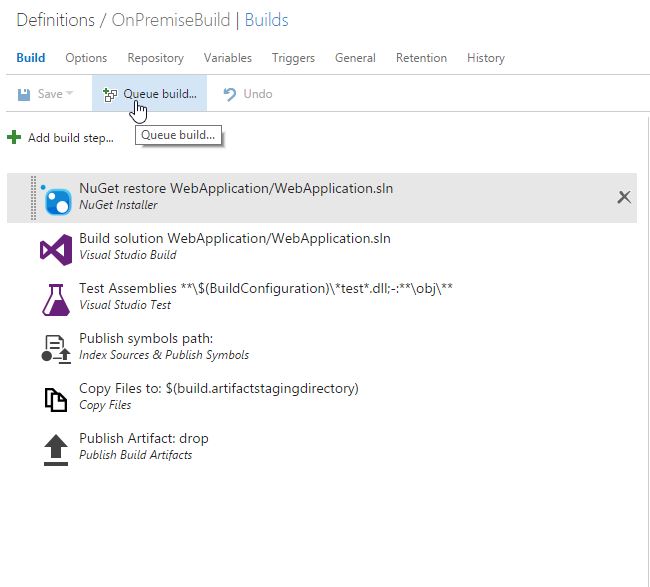
In the ‘NuGet restore’ and ‘Build Solution’ steps. Be sure to explicitly specify the solution file. In the ‘Build Solution’ step. Enter the following msbuild.exe argument: **'/p:DeployOnBuild=true /p:WebPublishMethod=Package /p:PackageLocation=$(build.stagingDirectory)'. **

Save the build definition and trigger a build
Install Relevant VSIX extentions
On your VSTFS2015 instance you will need to install some extensions. These are the IIS Extensions and can be found here:
https://marketplace.visualstudio.com/items?itemName=ms-vscs-rm.iiswebapp
Release
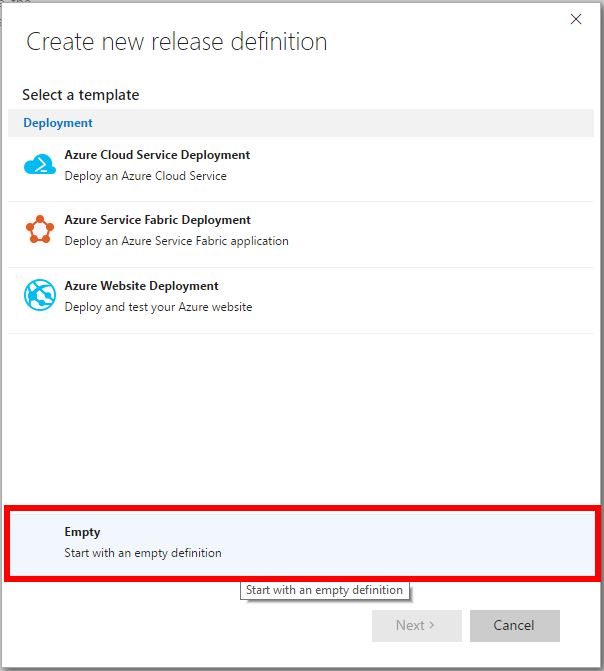
Go to the release tab and create a new ‘Release Definition’. Follow the wizard and be sure to tick ‘Continuous Deployment’
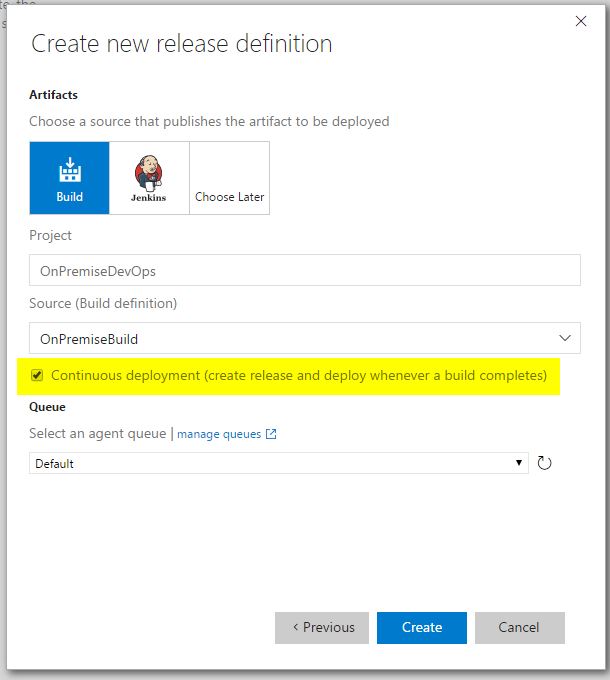
If your artifacts have not linked. Be sure to go to the artifact tab and link your artifact from the build definition we just created.
![]()
Go to the environment tabs and add 3 tasks
- Copy Windows Machine File Copy
- WinRM - IIS Web App Management
- WinRM - IIS Web App Deployment
Copy files to remote machine(s)
The first step is selecting the source of your drops. The target machine name, target machine credentials and the location where the drops should go on the target machine. Notice, I’ve made these variables because they will be used in the other two build steps.
![]()
![]()
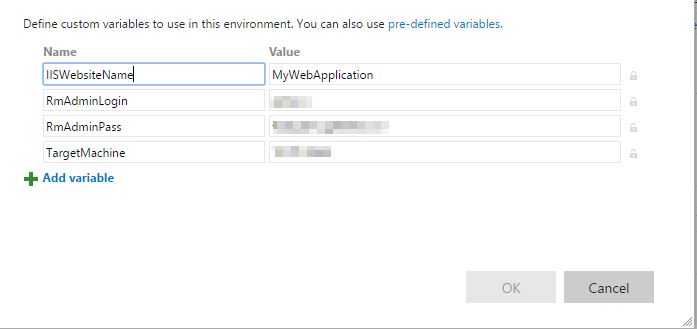
You can set these variables on an environment or on the release definition itself. I set them on the environment.
![]()
Manage IIS App
Because we’ve stored the connection and website settings from the previous step as variables. What we can do is simply enter them into the second step. Be sure to tick both ‘Create or Update Website’ and ‘Create or Update Application Pool’
![]()
Deploy IIS App
Likewise in the last step. All the variables have already been set as part of the environment. The ‘Web Deploy Package’ is the location of the zip file generated from our build. This is the file in the folder that was set in the first step of the release definition.
![]()
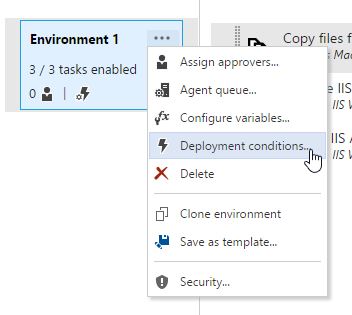
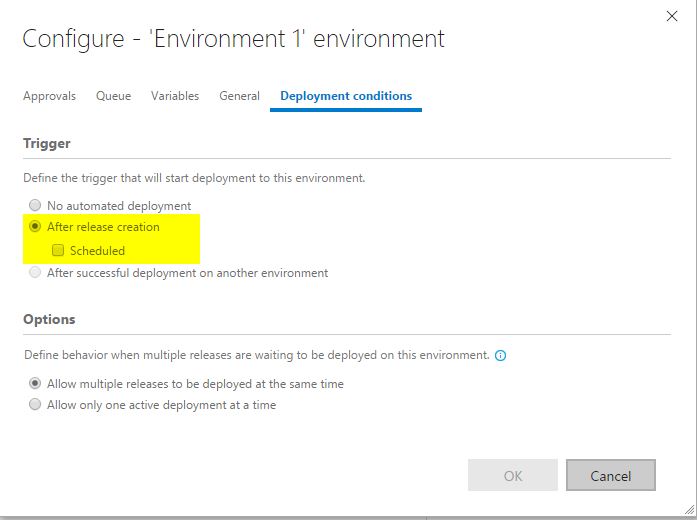
Setting release conditions for Continuous Deployment
The final step is setting the release conditions for continuous deployment.