Build and Release Pipeline for Your Own Custom VSTS Tasks
Anyone can create their own custom VSTS tasks and put them on the VSTS marketplace. There are tons of these custom tasks and they can be published publicly into the marketplace or privately into your own instance of VSTS. This blog post will demonstrate how to setup a build and release pipeline for these custom tasks (using custom VSTS tasks!).
There are many reasons to create your own tasks on an instance of VSTS. You could be part of a DevOps capability that wants to share common platforms, standardisation, or integrations. Generally though the reasoning is to avoid common steps that are duplicated across different build and release pipelines.
Prerequisites and gotchas
Before actually setting up your own pipeline for custom tasks. You’ll need to be able to create them locally first. I find the best tool for this is the tfx-cli that can be found here. It scaffolds your task folder structure and provides a mechanism to publish into VSTS. My personal preference is to write my custom tasks with PowerShell and as such I need to include the VstsTaskSdk in my source. The following structure is the result:
icon.png

sample.ps1

task.json

ps_modules

└───VstsTaskSdk

    │

    └───Strings

        └───resources.resjson
Setting up the pipeline
Install Dependencies
The first thing we need to do is install tfx-cli as a local dependency if we haven’t already done so:
npm init
npm install tfx-cli
Generate PAT
After you’ve done this, you’ll need to generate a personal access token from your account. To be extra secure only give this token access to the scopeMarketplace (publish) (if you want to push into the VSTS marketplace) and/or Agent Pools (read, manage) (if you want to push into your own VSTS instance).

Take note of this Personal Access Token as we’ll need it in a bit.
Create the Build Definition
Go to your instance of VSTS. Create an empty build definition, select your source location, and save the definition:

After you’ve done this, you’ll need to add a custom variable to your definition. Add your pat (which you created previously) as a secret variable:

Security Warning:
As you’ll be adding your PAT to this definition, anyone with permission to modify this build definition will be able to execute commands with the permissions that this PAT has on your behalf.
Make sure that the Build number format in the options tab is empty:
![]()
Add Build Number Tokens
In the code for your Custom Task. Open up your task.json file. In version:Patch replace the number with #{BUILD_BUILDNUMBER}# This token will eventually be replaced in the pipeline with the VSTS build number.

Add steps in Build Definition
You will need three steps in the build definition
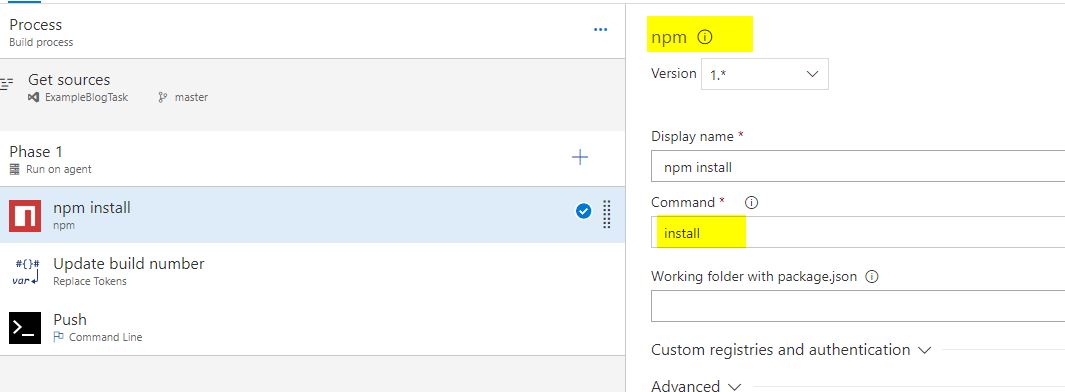
1. Install TFX on the build agent
Add a npm task with the command install
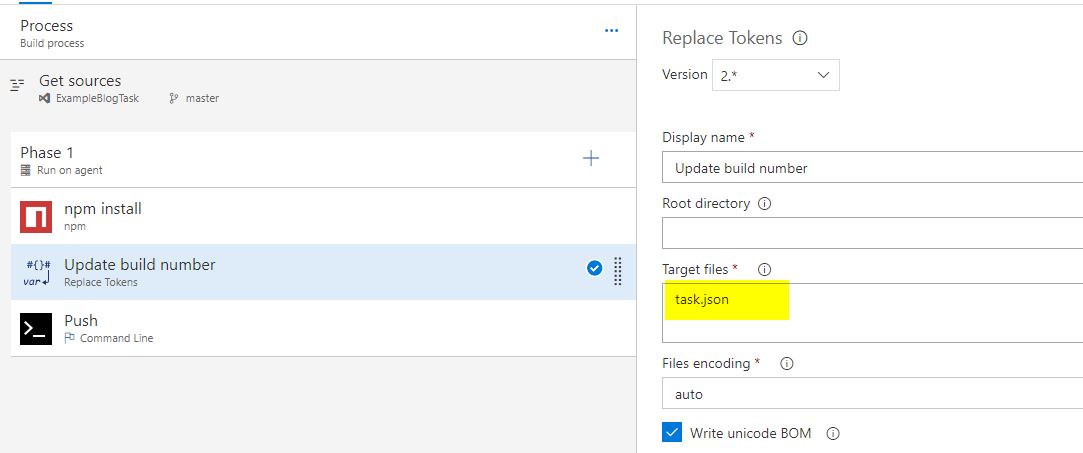
2. Replace tokens from task.json with the build number
Add a Replace Tokens Task that will automatically replace the build number from VSTS pre-defined environment variables. I like to explicitly define the files where the tokens exist. In our case: task.json
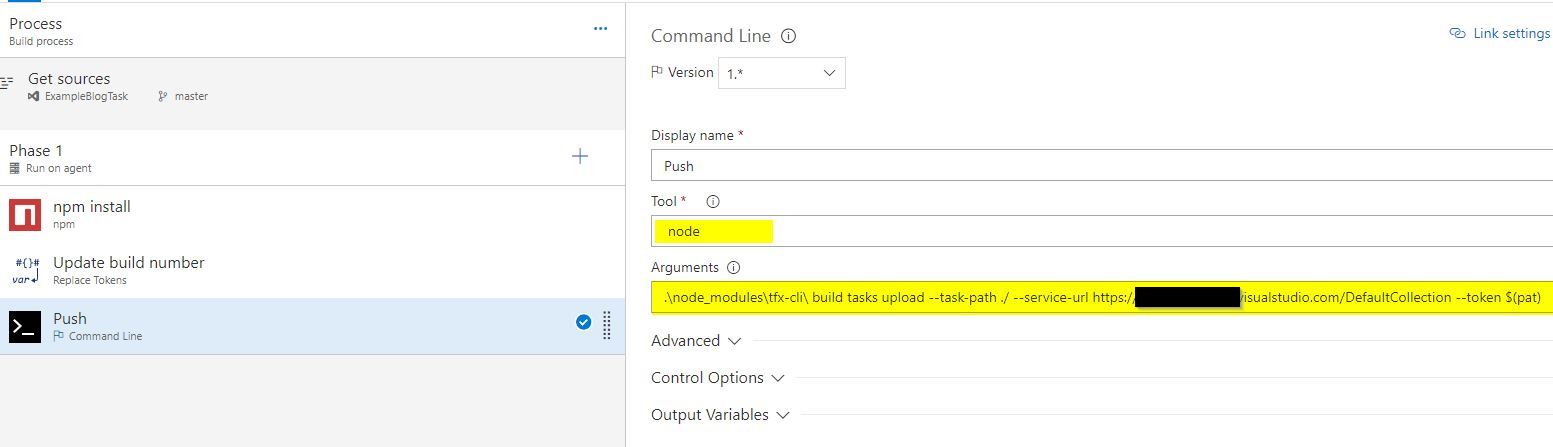
3. Push the Task to VSTS
Create a command line Task with node as the tool and the following arguments:
.\node\_modules\tfx-cli\ build tasks upload --task-path ./ --service-url https://{YOUR\_INSTANCE}.visualstudio.com/DefaultCollection --token $(pat)
Conclusion
The above is a very simple example on how we can create a pipeline for our custom tasks. However, there are various things that can be done to minimise chances of error and noise. These things include:
- Creating separate pipelines for build (npm install and update build number) and release (Push)
- As part of building including the PowerShell Task SDK.
The above improvements and others can be made depending on your specific team organisation and preferences. I’ll leave that up to you! Thanks for reading.